
Placement Targeting
Allow or deny websites and apps
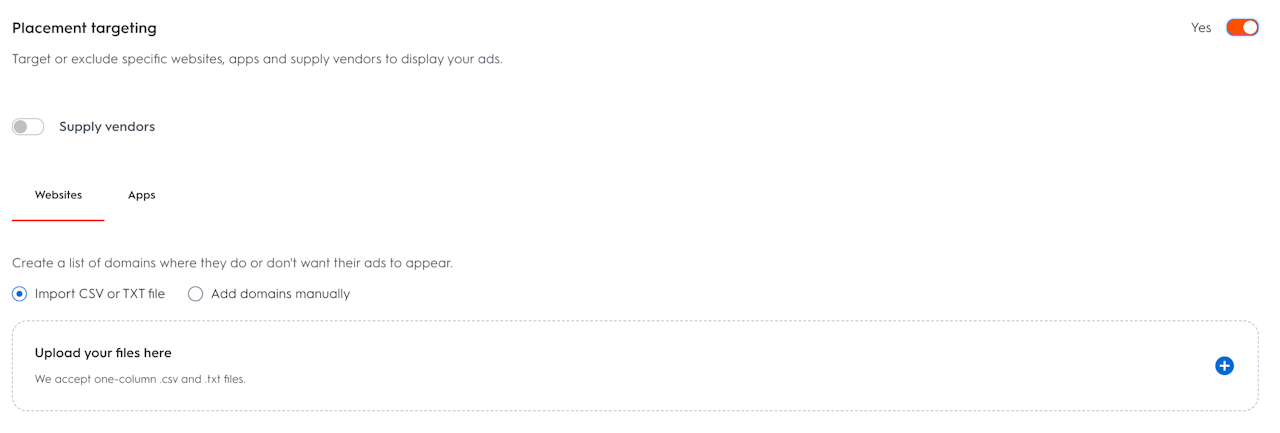
You can choose to allow or deny your ads from appearing on specific publisher websites or apps. This can be a helpful tool to ensure your ads appear on websites or apps that are in-line with your brand or business objective.
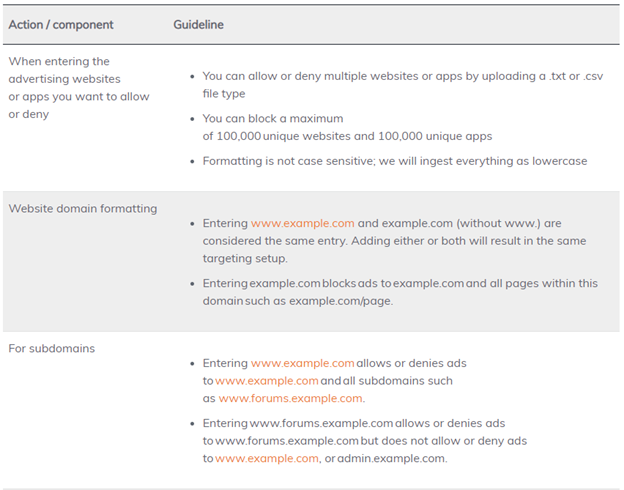
Below you will find formatting guidelines for allowing or denying websites or apps. Keep in mind that setting up allow or deny lists that are very narrow can limit reach and impact your ad set's ability to scale and spend in full.
How to allow or deny websites or apps in placement targeting
Select “Allow or deny websites or apps”
Either manually enter the website(s) or app(s) you want to allow or deny or import a .txt or .csv file format containing a list of websites or apps
Once finished, review the lists of websites and apps you've allowed or denied
To remove any websites or apps individually, delete them by selecting the trash icon
To edit or add to an existing .csv or .txt file follow the below steps:
Export the current list
Add the new domain/bundles to be targeted
Import this final list back into Management Center
Uploading a new .csv or .txt file will overwrite the current list of domains or app bundles.
When websites and apps will be blocked
Websites or apps will be allowed or blocked within one hour of applying the settings.
Supply Vendors
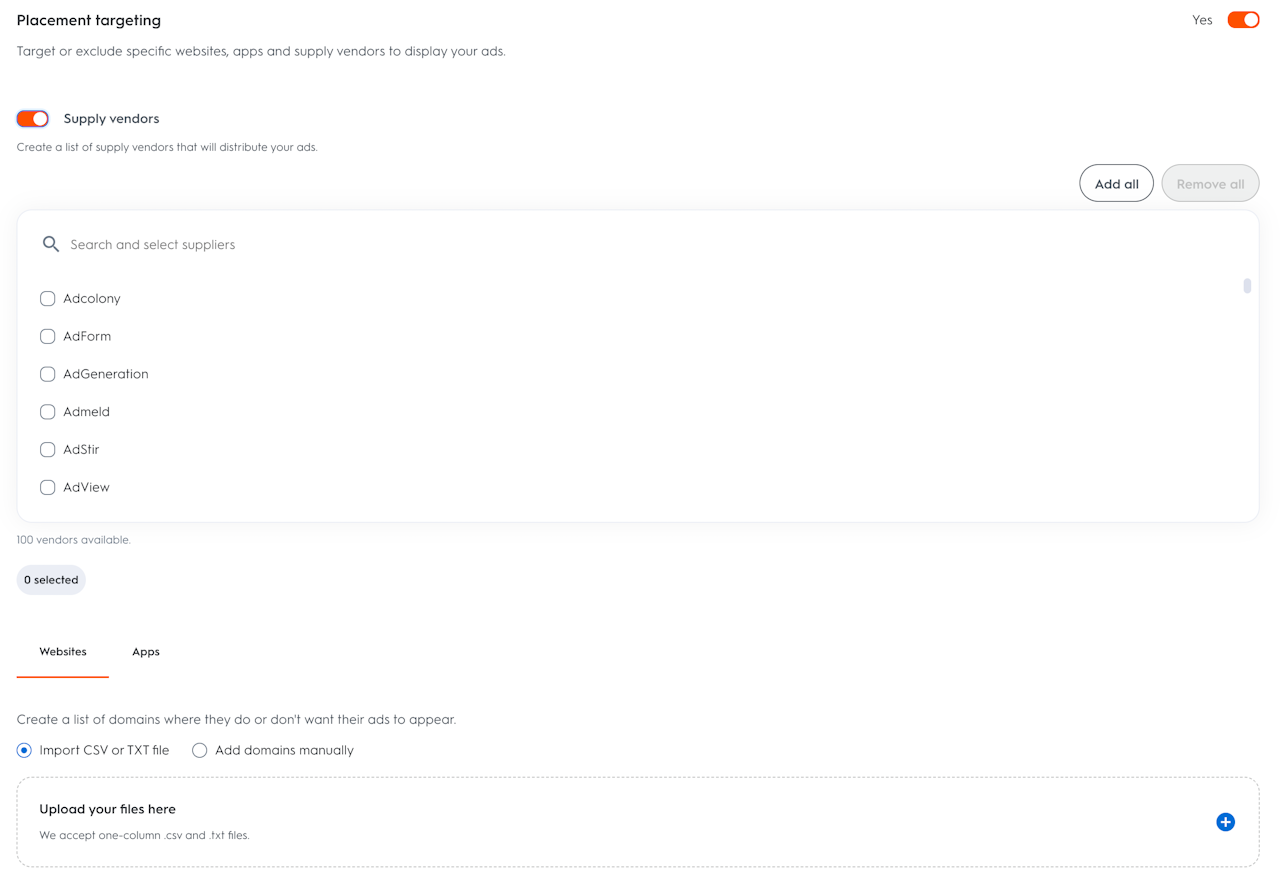
You can limit the supply vendors that will distribute your ads by activating the toggle and selecting the vendors on which you would like your ads to be displayed. By selecting Add all, you can easily then remove any specific vendors where you prefer not to display.
If you are not familiar with supplier vendor selection we suggest leaving this toggle in the off position to avoid limitations that can negatively impact you ad set’s reach and ability to reach your users.


